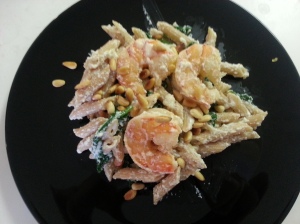
Creamy Spinach & Penne Pasta with Shirmp

20130428_191055

I used to hate all kinds of seafood when I was younger.  It was not until recently that I got used to it.  Shrimp was one of the first things I started to like.  I used to make it in a pan with butter, heavy cream and some spices.  To make it healthier, I removed the heavy cream and use a lot less butter.

This recipe also contains spinach.  This was another thing that I did not really like as a kid.  Now, I am fine with eating it raw in salads, but have not come to like it cooked.  This recipe has helped me to eat it cooked.

If you want to make this dish vegetarian, you can always do it without the shrimp.  If you want to make it gluten free, you can make it with gluten free pasta.

You will also want to make sure that you do not omit the lemon zest.  This helps bring out the flavors of the other flavors in the pasta dish.  When you do this, make sure you only add the zest and not the bitter pith.

If you are like me and were or are a picky eater, give this a try and see if you can enjoy those foods that you never thought you would like.

Ingredients:

4 oz whole-wheat penne pasta

1/2 pound shrimp

1/2 tablespoon butter

1 clove garlic, minced

1/8 teaspoon cayenne pepper

6 oz fresh or frozen spinach

1/2 cup part-skim ricotta cheese

2 tablespoons shredded Parmesan

1 teaspoon lemon zest

1/4 teaspoon salt

1/2 teaspoon pepper

2 tablespoons pine nuts, toasted

Directions:

1. Cook the pasta in boiling water.

2. While cooking the pasta, add the shrimp to the melted butter in a saute pan for 8 minutes, flipping half way though. Add the garlic and cayenne pepper.

3. If the spinach is frozen add to the pasta in the last 2 minutes.  If the spinach is fresh, drain the pasta over a colander filled with the spinach.

4. Return the pasta to the pot.  Stir in the ricotta, Parmesan, zest, salt, pepper and shrimp.  Garnish with the toasted pine nuts.

5. Serve and enjoy!

Leave me a comment and let me know what you thought.
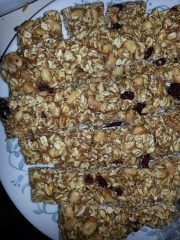
Granola Bars

20130421_211746

I started to make my own granola bars when I was in Denver, CO.  One of my classes for my Baking degree was cake decorating.  This was not my interest and I found that I did not have high patients for it.  So my professor would always have me make a snack for the class instead of doing skills.

We found many different recipes and change them to our liking.  She would have me make anything from cookies to granola bars to a lunch dish.  This was the most popular one that would get made.

I still make my own granola bars today, as they are better for me.  When you make your own, you can add what you want to go in them.  This also helps me stay away from processed snacks.

There are many different variations that someone can do with these.  If you want something different then this recipe, try changing out the type of nuts or the fruit.  You can also add chocolate or peanut butter.  Give them a try and see what you come up with.

Ingredients:

2 cups old fashioned oats (make sure you do not get the quick oats)

3/4 cup wheat germ

1 cup peanuts

3/4 cup brown sugar

1/2 cup honey

4 tablespoons butter

2 teaspoons vanilla

1/2 teaspoon salt

3 oz dried fruit ( I used cranberries)

Directions:

1. Preheat the oven to 400 degrees. Prepare a 9 x 13 baking dish with waxed paper.

2. Toast the oats and wheat germ at 400 degrees for 10 minutes. (make sure you give them a stir half way through)

3. Toss them with the peanuts and set aside.

4. Simmer the brown sugar, honey, butter and salt.  Stir constantly until smooth and well blended.

5. Remove from heat and stir in the vanilla.  Add this to the oat mixture and mix. Once mixed, add the fruit.

6. Press into prepared baking dish and allow to cool.

7. Once cool, cut and wrap the granola bars.

Leave me a comment and let me know what you would add or remove from these!

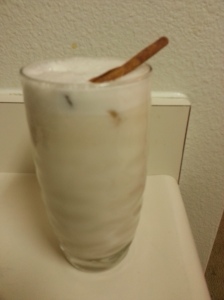
Horchata

20130421_211656

Horchata reminds me of when I lived in Denver, CO.  My friends took me to a little “hole in the wall” Mexican place and that is where I tried it for the very first time.  I was not quite sure about getting it at first, but they convinced me to get it and I loved it.

Since then, I have only found ones that I like at a few places.  I never thought about actually making my own horchata, as I figured it would be a difficult process to do.  My boyfriend recently decided that he really wanted it, so we figured that we would give making it a shot.

This was actually really easy to do and to make.  It also is very inexpensive and involves many items that most already have sitting around the house.  Anyone can make this, you just need the ingredient, a blender and a little time.

If you are making this for an event, you will want to prepare ahead of time, as it does need to sit in the refrigerator for at least 2 hours.  I left mine in there for almost 2 days (this increased the cinnamon flavor, but is not necessary).

Ingredients:

1 cup uncooked white rice

3 fresh cinnamon sticks (more if you would like a garnish)

8 1/2 cups filtered or bottled water (filtering it is not necessary, but gives it a better flavor)

1/2 to 1 cup sugar

2 teaspoons vanilla

Directions:

1. Rinse the rice.  Place in a bowl or large measuring cup with 2 cups of the water and the cinnamon sticks and cover.  Place in refrigerator and allow to sit for at least 2 hours.

2. Place the rice mixer in a blend and blend for 4 minuets or until well mixed.  Strain through a fine strainer to remove any chunks.

3. Return back to the blender and add the remaining water, vanilla and 1/2 cup of sugar.  Blend until mixed together.  Taste and see if more sugar is needed.  Add until it is as sweet as you would like it.

4. Keep in the refrigerator and serve over ice.  Garnish with a cinnamon stick if you would like.

Leave a comment below and let me know how it went for you!

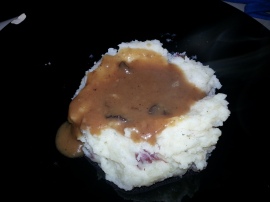
Garlic Mashed Potatoes

20130415_201614

Mashed potatoes are not just for Thanksgiving.   They complement many homey dishes.  I have had many varieties of them with many different entrees.  My favorite entrees that my mom used to make with mashed potatoes are country fried steak, ham and fried chicken.

They are good creamy, chunky, plain, garlicky or any other ways you want to make them.  With the potatoes that I have made, you do not even need to have gravy on them.  But if you like gravy you can get a brown gravy, homestyle gravy or you can use the gravy from my Country-Fried Steak with mushroom gravy recipe.

The traditional mashed potato is made with a russet potato, that is peeled.  My favorite potato to use is a red potato, unpeeled.  I think the skin add extra flavor and a give the potato a different texture.  You an also make them with Yukon gold or purple potatoes.

Roasting garlic does take about and hour to and hour and a half, so make sure you plan accordingly so that you can make this recipe fast.  You can roast the garlic up to a week early and keep it in the fridge for later use.

Serving Size: 4 people

Ingredients:

1 bulb garlic

1 teaspoon olive oil

1 pound red potatoes, cleaned and diced

2 tablespoons butter

1/4 cup milk

salt and pepper to taste

Directions:

1. Preheat the oven to 350 degrees.  To roast the garlic cut the top off.  Place on foil; drizzle the oil over the top and close the foil.  Cook for one to one and a half hours or until garlic is soft and golden in color.  Let cool and remove the cloves.

2. Boil the potatoes until they are soft, about 8-10 minutes; drain.

3. Add in the butter, the milk, and garlic to your liking.  Mash until they are the consistency you like.  You may need more or less milk.

4. Stir in the salt and pepper and serve.

Leave a comment and let me know what you like to eat mashed potatoes with.

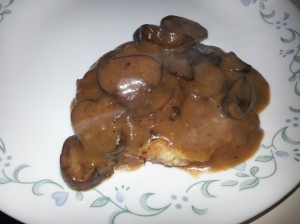
Country-Fried Steak with mushroom gravy

20130415_201712

I have always liked country-fried steak.  I have had it at many restaurants, and have not found one that I really do not like.  The thing with having country-fried steak at a restaurant, is that you do not know what is in the batter or how healthy it is for you.

With making it at home, you are able to control what is in it.  If you can control the ingredients that go into your food, then you can control how much of a certain thing you are eating.  You can control the salt, the fat and much more.

I have learned that you can make any meal that you want, you just need to learn how to portion it out.  Smaller portions make a diet and eating healthier become more successful.  This is the other downfall of having country-fried steak at a restaurant.

I made mine with a mushroom gravy, but you can also make it with onions.  You could also do a home-style cream gravy.  If you do the home-style gravy, make sure that you are not using as much as it adds more calories.  Here is a healthier way to make country-fried steak at home.

Ingredients:

4 tablespoons skim milk

2 egg whites

10 tablespoons flour, divided

4 cube steaks

3 tablespoons cajun seasoning

5 tablespoons olive oil

1 cup mushrooms, sliced

2 tablespoons ketchup

2 teaspoons Worcestershire sauce

3/4 cup water

1 beef bouillon cube

1/8 teaspoon salt and pepper

Directions:

1. Whisk together milk and egg whites in a shallow dish.  Place 7 tablespoons flour in a separate dish.  Season both sides of the steaks with the cajun seasoning.

2. Dip the steak into the milk mixture, then dredge both sides in flour.

3. Heat 4 tablespoons oil in a large skillet over medium heat.  Add steaks; saute to desired doneness, about 4 minutes per side.  Remove from skillet and tent with foil to keep warm.

4. Add remaining oil to skillet.  Add the mushrooms; saute until they begin to brown. Sprinkle with the remaining flour; cook for one minute, stirring constantly.

5. Stir in ketchup and Worcestershire.  Add the water and beef bouillon.  Bring to a boil.  Simmer until sauce reduces, about 5 minutes.  Season with salt and pepper.

6. Serve over steak and enjoy!

Leave a message and let me know what you though of the dish.

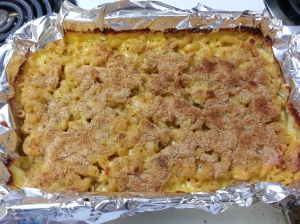
Low-Fat Mac & Cheese

20130408_200208


Like I have said in previous post I am a pasta lover, but it does not always seem like it belongs in a diet.  I have found a magazine called Cuisine at Home, that has shown me how to make some of the pasta dishes I really like into a healthier version.

I have always like mac and cheese, whether it was from the box or homemade.  My mom would make it when we would have fried chicken and it was a very homey meal for my family.  I figured this is one of the things that I would need to cut from my diet, but this has shown me a way to keep it in there every once in awhile.

I made some of my own changes to this recipe, but used it as a base to get me going.  I added some chicken to this as well, to get me the protein that I need.  I also used macaroni noodles instead of the penne noodles that they suggested.

If I was the one not making the dish, I would have not known that it was a healthy mac and cheese or that it contained cottage cheese and low fat milk.  I was a little hesitant to give this a try since I do not like cottage cheese, but the way it is incorporated I could not tell what cheese I was eating.  As a lesson, do not be afraid to try something different as you never know how it will turn out.  This is one to give a try on the whole family.

Ingredients:

2 medium chicken breast

1 tablespoon olive oil

4 oz dry whole wheat macaroni pasta

1/4 cup bread crumbs

1/4 teaspoon black pepper

1/2 cup cottage cheese

1 teaspoon yellow mustard

1/2 teaspoon salt

1/8 teaspoon cayenne pepper

1 cup low-fat milk

2 garlic cloves, minced

1 1/2 tablespoons flour

1 cup shredded extra-sharp cheddar

Directions

1. Heat the oil in a pan.  Cook the chicken until it is not pink.  Set aside.

2. Preheat the oven to 400 degrees.  Coat a 1 quart baking dish with nonstick spray.

3. Cook the pasta in boiling water; drain.  Add the chicken.

4. Toss the bread crumbs and pepper together in a small bowl.

5. In a food processor, add the cottage cheese, mustard, salt and cayenne until smooth.

6. Heat 3/4 cup milk and garlic in a sauce pan over medium heat until milk steams.  Whisk the flour into the remaining milk and add to the heated milk.  Mix until thicken.  Whisk in the cottage cheese mixture until smooth.

7. Stir in cheddar cheese until melted.  Pour over the noodles and chicken and mix well.  Transfer to the baking dish and top with the bread crumbs.

8. Bake the mac and cheese until the bread crumbs are golden, about 20-25 minutes.  Remove from the oven and allow to sit for 5 minutes.

9. Serve and enjoy.

Leave a comment below and let me know what you think of the healthier version of mac and cheese.

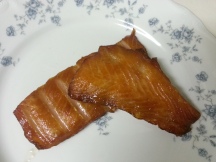
Smoked Salmon

20130414_224352

I was a picky child when it came to eat.  I did not like fish at all.  It took until I was 20 years old before I liked to eat any kind of fish.  I even worked at a sushi bar in Denver, Colorado and still had trouble eating some of the items they gave me.  Although I did have some issues eating fish there, I think that is when I started to accept fish.

They had me try all kinds of things.  I tried anything from a simple California roll to octopus face.  Some of those were more pleasant than others.  Then I can back to Reno and met my boyfriend.  This is where I started to try more and more fish items.

He introduce me to salmon cooked on the grill with a sauce that his dad always put on it.  It was really good.  From there, I started to eat other kinds of fish, sushi, shrimp, lobster and crab.  My eye have been opened to how good fish can really be and I am open to trying more items.

For the first time, we decided to shy away from his dads recipe and try something new.  We decided to do smoked salmon that had been in a brine for twenty-four hours. I have a smoker to do this in, but you can also do it on the grill with ceder planks. It was very different from what we are used to, but still have a great flavor.

Ingredient:

2 cups water

1/2 cup brown sugar

2 tablespoons soy sauce

1 tablespoon kosher salt

1/2 cup maple syrup

4 garlic cloves

1 pound salmon

Directions:

1. Mix the sugar into the water until dissolved.  Once dissolved, add the soy sauce, salt, maple syrup, and garlic cloves.  Whisk well.

2. Place the salmon in a baking dish (make sure that it is not too big, you want the salmon to just fit).  Pour the brine over the fish.  Cover and let sit in the fridge for about 24 hours.

3. Place on the smoker for 3-4 hours.

4. Serve and enjoy.

Please leave a comment and let me know what foods you used to hate when you were younger, but you like now.

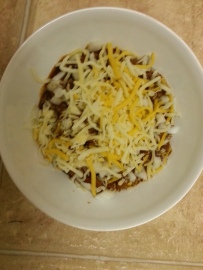
Quick and Easy Chili

20130409_200651

Chili is one of my favorite dishes.  It reminds me of when I was little and my mom would make it on a cold day.  I used to be a picky eater and I did not like a lot of thing to go into my food.  With chili, I did not like to have chunks of tomato or onions in it.  So my mom would cater to me and take some of it out before adding in the tomato and she would just cut the onion and put it on the side for them to add in if they wanted it.  Now I am not as picky, but I still do leave the tomato out and I still do not eat it with onion, as it is how I always remember eating it.

There are so many different things that you can add on top of chili when eating it.  I have seen people do sour cream, salsa, corn chips, corn bread, cheese and onion.  I have never tried it with sour cream or salsa, but I do love to add cheese to mine.

One great thing about chili, is that it can be made to fit to what anyone likes.  I know one person that does not do chili with beans.  Then you can make it spicy or keep it mild.  There are also so many things you can add into it and change it up every time.  Here is the simple recipe that I always grew up on.

Serving Size: 2-3 people

Ingredients:

1/2 pound ground beef

1 can ranch style beans

1 can tomato sauce

1/2 packet of chili seasoning (I use McCormick)

cheese as needed

1-2 Tablespoons onion, diced (optional)

Directions:

1. Brown the ground beef in a sauce pan.  Drain the grease out.

2. Add in the beans, tomato sauce, and the chili packet.  (If it is not hot enough for you, add a little cayenne pepper)

3. Turn to simmer and allow to cook for at least 10 minuets.  Stir occasionally.

4. Serve in a bowl and top with cheese and onion.

Leave a comment and let me know how you like to eat your chili.

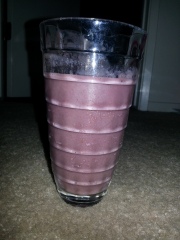
Fruit Smoothies

20130407_073824

Smoothies have been one of my favorite drinks for as long as I can remember.  The biggest thing that they remind me of is when I would have sleepovers with my cousins in the summer.  They would come stay over for many days at a time.  Each morning we would get up, play music, make french toast and a smoothie.  This became a ritual for at least one of the mornings that they would be over.

Now, I use smoothies as a healthier alternative for breakfast or just as a pick me up snack.  I will also substitute a smoothie for a dessert if I really am craving something sweet.  They can be drank anytime of the day.

Smoothies are one of the simplest things that can be made at any time.  The best thing about them is that you can add anything that you want to them.  You can make them super sweet, sour, a little bit savory and the list goes on.  I normally make them with whatever fruit that I have on hand and add some spinach to them.  I have also added flax seed and agave nectar.   The agave nectar helps give it a hint of sweetness (this is especially good when the fruit is not in season) and the flax seed is good to get your omega 3 vitamins.  I suggest that you use the flax seed if you do not eat a lot of fish.

Here is one of many ways that you can make a smoothie.

Serving size: 2-4

Ingredients: 

1 cup almond milk

1 cup strawberries (about 6 large ones)

1 large banana

1/2 container of blackberries

handful spinach

1 tablespoon flax seed

1/2 to 1 cup ice

Directions:

1. Combine everything in a blender (I use a vita mix).

2. Blend on medium to medium high until well mixed.  Add more ice as needed.

3. Serve and enjoy!

Leave me a comment and let me know what kinds of fruits or vegetables you like in your smoothies.

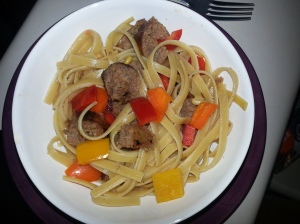
Easy pasta with peppers

20130403_193430

It is time to put the hardy and comforting food away now that spring is finally here.  For me, I think of light and refreshing foods during spring and summer time.  I want to have a dish that will fill me up, but not weigh me down.  Now I know that pasta is normally a heavier meal, but I have found a way to make it light and tasty.  And now that there are more choices for spring vegetables, you can lighten up any type of pasta dish or even an every day meal.

If you are like me you do not want a heavy meal after working out.  For me this is a difficult task to accomplish since I work out later in the day and by the time I am done, I need to be starting on getting dinner ready.  I have found a really light and refreshing pasta dish that is quick and easy to make.  This dish can be varied in so many different ways, you just have to use your imagination.  And with just five ingredient, it is easy on the wallet.

Serving 2-3

Ingredients:

2-3 sweet Italian sausages

1-3 bell peppers (I like to do a mixture of red, orange, and yellow)

9 oz fettuccine or spaghetti noodles

2-3 tablespoons pine nuts

1 teaspoon olive oil

Directions:

1. In a large pot, bring some water to a boil.  Add the noodles and cook until they are al dente. Drain.  Toss with the olive oil.

2. While the pasta is cooking, cook the sausage until cooked all the way through.  Once they are cooked, cut into bite size pieces.

3. Chop the bell peppers into bite size pieces and set aside.

4.  When the pasta is almost done, you are going to toast the pine nuts in a small skillet on medium low heat.  This will release the flavors.

5. Toss everything together and serve.

You can change this dish up by adding different vegetables or try using chicken instead of sausage.  I would try this with squashes, tomatoes, spinach, or any other fresh vegetable that you like.  You can also add a little freshly grated Parmesan cheese if you want to add a salty flavor.  Spice it up any way you like.

And if you are feeling like you want a little treat with this, try making some garlic bread to serve along side with it.

Leave a comment below and let me know what you would add to this dish.